BentoML
基本流程:
train.py训练模型- 使用bentoml保存模型
- 构建
service.py,创建相应的服务 - 创建
bentofile.yaml文件 - 使用命令行
bentoml build构建Bento - 将构建好的Bento推送到Yatai上部署 / 在本地使用命令启动服务
- 发送预测请求
一、使用BentoML保存模型
如果想要开始使用BentoML服务,首先需要将训练的模型使用BentoML的API在本地进行保存。
bentoml.(framename).save_model(modelname, model)
framename取决于你构建机器学习模型时使用的框架。
modelname为模型保存后的名字,并且会自动生成一个版本字段,用于检索模型。
model为你所构建的模型的变量名
假如我此前已经定义了两个变量:
mnist_clf = 'tensorflow_mnist'
mnist_model = tf.keras.models.load_model('models/mnist_model.h5')
那么有以下保存模型的例子:
bentoml.tensorflow.save_model(mnist_clf, mnist_model)
e.g. 基于sklearn实现的iris数据集模型:
import bentoml

from sklearn import svm
from sklearn import datasets

# Load training data set
iris = datasets.load_iris()
X, y = iris.data, iris.target

# Train the model
clf = svm.SVC(gamma='scale')
clf.fit(X, y)

# Save model to the BentoML local model store
saved_model = bentoml.sklearn.save_model("iris_clf", clf)
print(f"Model saved: {saved_model}")

# Model saved: Model(tag="iris_clf:zy3dfgxzqkjrlgxi")
以下是BentoML目前支持的机器学习框架:
- CatBoost
- Diffusers
- fast.ai
- Keras
- LightGBM
- MLflow
- ONNX
- PyTorch
- PyTorch Lightning
- Scikit-Learn
- TensorFlow
- Transformers
- XGBoost
- Detectron2
- EasyORC
二、创建服务
创建一个service.py文件以提供服务:
# service.py

import numpy as np
from PIL.Image import Image as PILImage

import bentoml
from bentoml.io import Image
from bentoml.io import NumpyNdarray


# 实例化runner对象
mnist_runner = bentoml.tensorflow.get("tensorflow_mnist:latest").to_runner()

# 创建服务
svc = bentoml.Service(
    name="tensorflow_mnist_demo",
    runners=[mnist_runner],
)


# 提供预测服务的函数
@svc.api(input=Image(), output=NumpyNdarray(dtype="float32"))
async def predict_image(f: PILImage) -> "np.ndarray":
    assert isinstance(f, PILImage)
    arr = np.array(f) / 255.0
    assert arr.shape == (28, 28)

    # We are using greyscale image and our PyTorch model expect one
    # extra channel dimension
    arr = np.expand_dims(arr, (0, 3)).astype("float32")  # reshape to [1, 28, 28, 1]
    return await mnist_runner.async_run(arr)
现在,我们有了一个可以对MNIST手写数字识别数据集中的图片进行预测的BentoML服务了。
三、构建Bento
一旦定义了服务,我们就可以将模型和服务制作成bento,Bento是服务的发布格式,它是一个独立的归档文件,运行服务所需的所有源代码、模型文件和依赖关系规范。
要构建Bento,首先要在项目目录中创建一个bentofile.yaml文件:
service: "service:svc"
description: "file: ./README.md"
labels:
  owner: bentoml-team
  stage: demo
include:
- "*.py"
exclude:
- "locustfile.py"
python:
  lock_packages: false
  packages:
    - tensorflow
    - Pillow
BentoML在bentofile.yaml中提供了大量构建选项,用于自定义Python依赖关系、cuda安装、docker镜像分发等等。更多有关bentofile.yaml选项的信息请点击构建Bentos。
接下来就可以在包含service.py和bentofile.yaml文件的目录下构建bento了!
运行bentoml build CLI 命令:
$ bentoml build

██████╗ ███████╗███╗   ██╗████████╗ ██████╗ ███╗   ███╗██╗
██╔══██╗██╔════╝████╗  ██║╚══██╔══╝██╔═══██╗████╗ ████║██║
██████╔╝█████╗  ██╔██╗ ██║   ██║   ██║   ██║██╔████╔██║██║
██╔══██╗██╔══╝  ██║╚██╗██║   ██║   ██║   ██║██║╚██╔╝██║██║
██████╔╝███████╗██║ ╚████║   ██║   ╚██████╔╝██║ ╚═╝ ██║███████╗
╚═════╝ ╚══════╝╚═╝  ╚═══╝   ╚═╝    ╚═════╝ ╚═╝     ╚═╝╚══════╝

Successfully built Bento(tag="tensorflow_mnist_demo:n5g45ibme2efgedi").

Possible next steps:

 * Containerize your Bento with `bentoml containerize`:
    $ bentoml containerize tensorflow_mnist_demo:n5g45ibme2efgedi  [or bentoml build --containerize]

 * Push to BentoCloud with `bentoml push`:
    $ bentoml push tensorflow_mnist_demo:n5g45ibme2efgedi [or bentoml build --push]
当然 你也可以指定需要构建的bento:
bentoml build -f ./src/my_project_a/bento_fraud_detect.yaml ./src/
和保存模型类似,新创建的bento也会自动生成唯一的版本标签。
你可以使用bentoml list查看你在本地构建的所有bento

当你有多个bento的时候,你是否需要清理一些不需要的bento?
你可以使用bentoml delete {bentoname:version}来删除不需要的bento

四、进行预测
1、提供服务
目前已知的有两种提供服务的方式:
- 本地使用命令行提供服务
首先使用bentoml serve {bentoname:version} CLI命令来运行它,得到一个bentoserver:

此时我们向localhost:3000/{svc.api_name}发送请求时,携带我们需要让其进行预测的数据以及数据类型,便可以获得相应的预测结果了。
- 将模型推送到Yatai上并部署
在bento build完成之后,可以将模型push到yatai上,在Yatai上根据提示部署模型。设置相应的服务器端口便可以使用预测服务了。
2、进行预测
目前已知的有三种进行预测的方式:
- 不使用服务,直接加载本地使用
bentoml.{framename}.save_model方式构建出来的模型,再进行预测(目前eb使用的就是这种方式
import bentoml

tensorflow_mnist_runner = bentoml.tensorflow.get("tensorflow_mnist:latest").to_runner()
tensorflow_mnist_runner.init_local()
tensorflow_mnist_runner.run(image)
- 使用服务,发送请求,通过服务进行预测从而获取结果
import requests

requests_url = "http://127.0.0.1:3000/predict_image"


def predict(img_url, request_url):
    # 获取二进制的url
    with open(img_url, 'rb') as f:
        img_bytes = f.read()

    # 向创建的服务发送预测请求 包含 请求地址、请求头(内容类型)、以及预测的数据
    result = requests.post(
      "http://127.0.0.1:3000/predict_image",
      headers={"content-type": "image/png"},
      data=img_bytes,
    ).text
    # 将预测结果转化为对应标签
    result = eval(result)[0]
    max_value = max(result)
    max_index = result.index(max_value)
    # 返回预测出来的标签
    return max_index

results = []
for i in range(10):
    result = predict(f'./samples/{i}.png', requests_url)
    results.append(result)
print(results)

>> output:[0, 1, 2, 3, 4, 5, 6, 7, 8, 9]
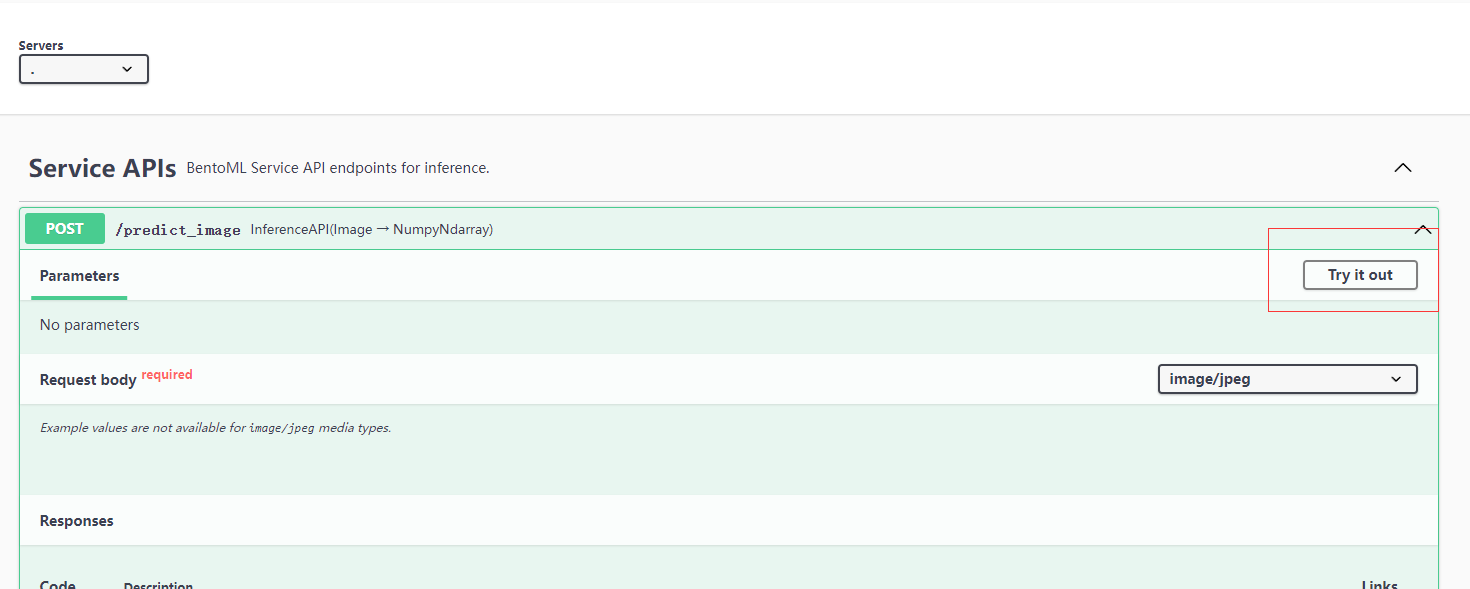
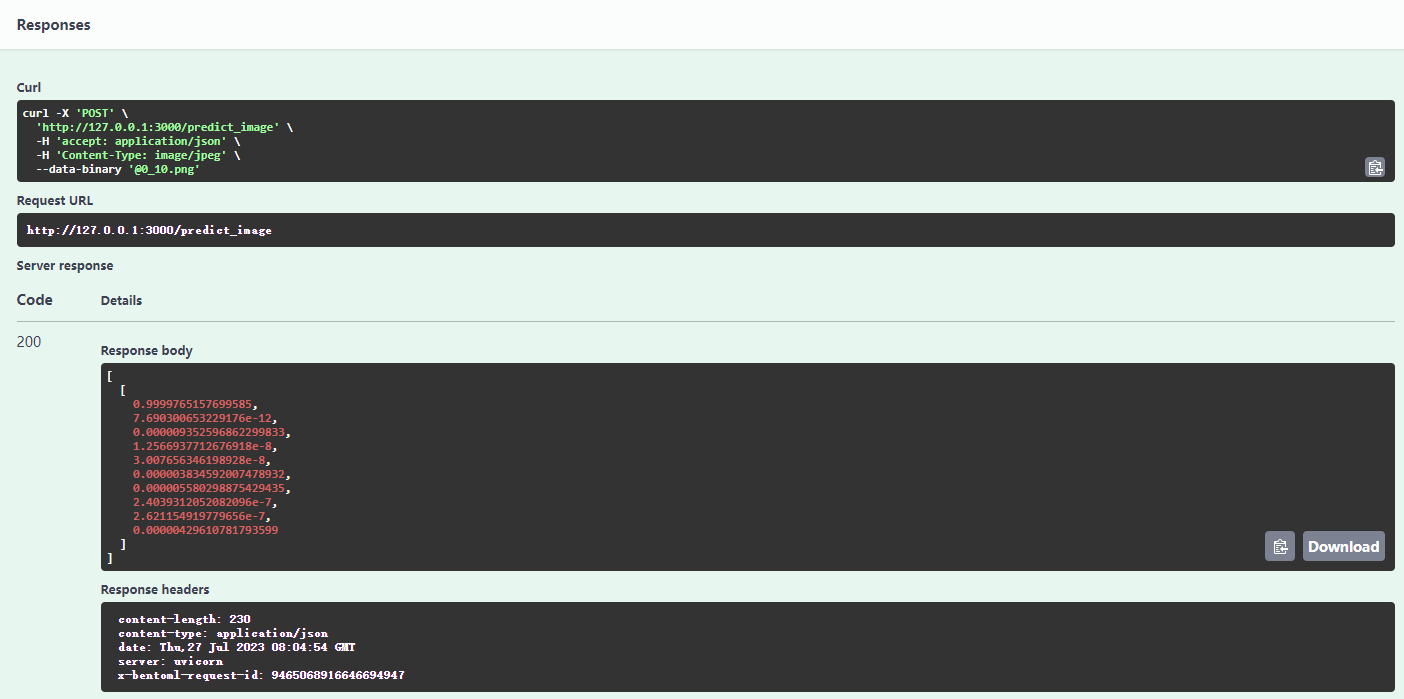
- 使用Swagger UI,交互式的发送预测请求
点击Try it out:

选择图片发送请求:

查看返回结果:

五、Swagger UI
基本流程如下:
- 在构建Bento的时候在
bento_name/version/apis/文件夹下生成了openapi.yaml文件,生成的openapi.yaml文件它遵循以下规范。 - 当使用
bentoml serve在本地启动了BentoML服务或者在Yatai上部署后,它便会将openapi.yaml文档自动提供给Swagger UI,使其可以在前端渲染。 - 其中的
docs.json是由Swagger UI从BentoML服务的OpenAPI规范文件自动生成的。
Swagger UI 中自动生成的内容
src/bentoml/_internal/service/openapi/__init__.py
openapi.yaml文件生成的代码路径
src/bentoml/_internal/bento/bento.py
基于__init__.py中的函数openapi_spec构建
定义了服务上传多个文件输入/输出的 API 规范
src/bentoml/_internal/io_descriptors/multipart.py
定义端点和前端内容
src/bentoml/_internal/server/http_app.py